Create an offline-first and installable PWA with SvelteKit and workbox-precaching
Like video tutorials better?
This blog post is also available in video format on my YouTube channel!
In this guide we will create an offline-first and installable Progressive Web App using SvelteKit and workbox-precaching.
Requirements
You need to have a SvelteKit compatible JavaScript runtime like Node.js (>= 16) installed on your system.
#Table Of Contents
- Create a new SvelteKit app (optional)
- A little bit about Progressive Web Apps
- App Icons
- Web App Manifest
- Service Worker
- Prerender Start URL
- Our final PWA
- A quick note on waiting Service Workers
#Create a new SvelteKit app (optional)
If you aren’t using an existing SvelteKit app, you can easily generate one with a single command.
Run the command npm create svelte@latest my-offline-app in a terminal window.
Need to install the following packages:
  create-svelte@2.0.0-next.192
Ok to proceed? (y)- If the CLI asks “OK to proceed?” type “y” and press enter.
- The CLI will ask you “Which Svelte app template?“. If you are unsure, pick “Skeleton project”, since this sets up the minimal code needed for our new SvelteKit app.
- The CLI can add additional technologies like TypeScript, ESLint and Prettier to your new SvelteKit app. If you are unsure, just say no, since they can also be added later.
Next steps:
  1: cd my-offline-app
  2: npm install (or pnpm install, etc)
  3: git init && git add -A && git commit -m "Initial commit" (optional)
  4: npm run dev -- --open
After initial the CLI is done it will display a couple of handy next steps. Go ahead and follow these, and check out your brand new SvelteKit app.
#A little bit about Progressive Web Apps
Before we get going, just a tiny bit of context:
PWA stands for progressive web apps. By that we mean a set of browser features web apps can use to make them behave more like a native app that is running directly on your operating system. We will use these features to make our web app work offline and be installable as an app in your operating system, so you can use it outside of your browser frame as a separate window.
Learn More
Learn more about PWA: developer.mozilla.org - Progressive web apps (PWAs)
While implementing PWA features, we refer to the “Application” tab in our dev tools. The most important bits for this guide are the “Manifest” and “Service Workers” sections. We will need to add both a Web App Manifest and a Service Worker to our project. Besides that, we also require App Icons to create an installable PWA, so let’s start with those.
#App Icons
The App Icon will be displayed in the users operating system launcher when they install it. You can create them yourself, or grab the pre-made icons I made for this guide below. In this section I will explain how I created my Icons.
Hint
If you don’t have any icons yet, you can download this zip file with pre-made icons, and extract them into the /static/ folder inside your SvelteKit app.
You can then skip to the next section: 👉 Web App Manifest
To create an App Icon, I used Figma and created a simple Icon inside a frame. I recommend using shapes instead of bitmaps, to have a scalable image, that always looks crisp.
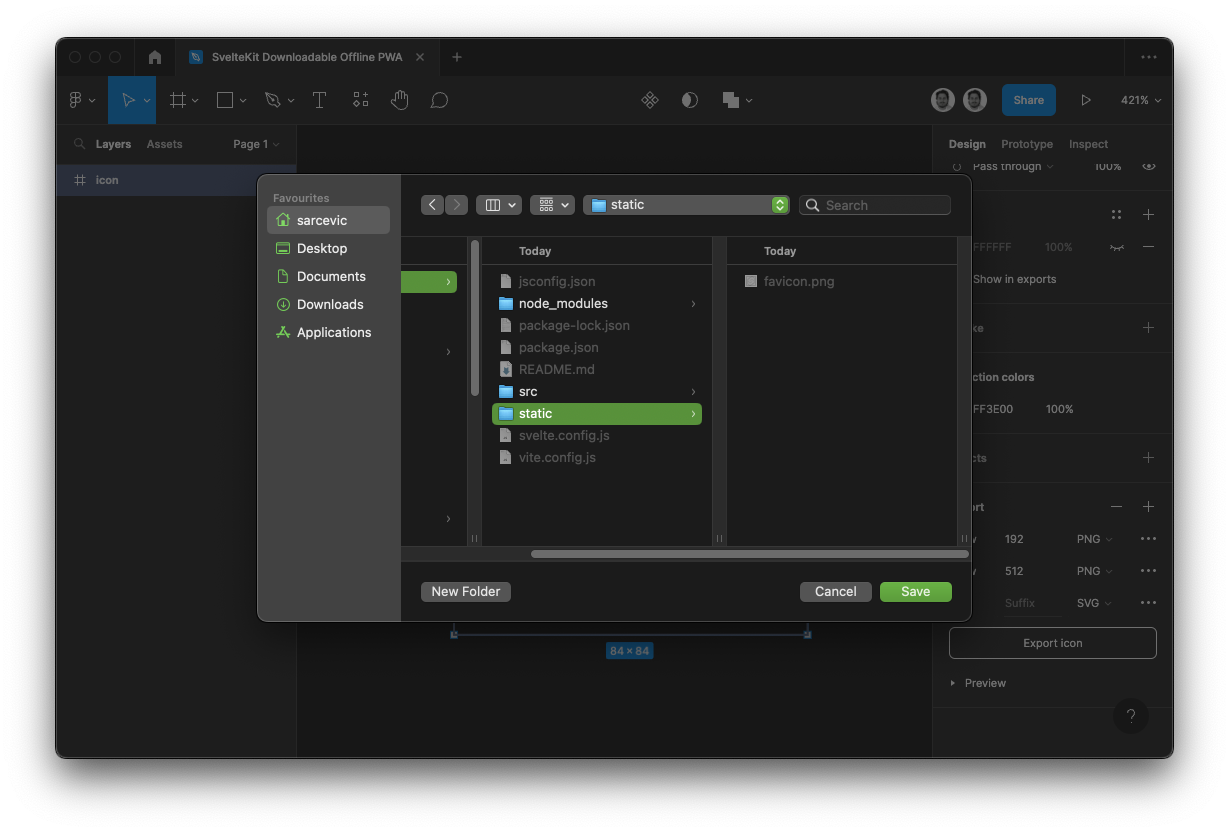
If you are done designing your App Icon, you can export the needed images by selecting the icon’s frame and adding the following options in the “Export” section in the right panel at the bottom: ![]() Export settings:
Export settings:
- Size: 192w, Suffix: 192, Format: PNG.
- Size: 512w, Suffix: 512, Format: PNG.
- An additional SVG of your icon could be useful, especially if you want to display your logo inside the web app. Modern Browsers even allow you to use our SVG as a favicon.
When you got the export settings right, click the “Export icon” button and export the files to your SvelteKit app’s /static/ folder.
#Web App Manifest
We need a Web App Manifest to provide metadata on our web app to the browser. This is important, so the browser can understand how to correctly describe and display our PWA.
Learn More
Learn more about Web App Manifest: developer.mozilla.org - Web app manifests
#Create a manifest file
Create a /static/manifest.json file that holds our web app’s metadata, like the name of the web app, the icons we added above and what color the web app’s theme should be.
Copy and paste the following JSON inside your /static/manifest.json file. This references the previously added icons.
/static/manifest.json
{
	"name": "My offline App!",
	"short_name": "my-offline-app",
	"start_url": "/",
	"display": "standalone",
	"theme_color": "#ffffff",
	"background_color": "#000000",
	"icons": [
		{
			"sizes": "192x192",
			"src": "icon192.png",
			"type": "image/png"
		},
		{
			"sizes": "512x512",
			"src": "icon512.png",
			"type": "image/png"
		}
	]
}
Feel free to adjust the fields of this template to your liking. You can also add more details about your web app and even add functionality like shortcuts and protocol handlers by following the specifications.
#Modify the HTML head
We also need to modify the head of our web app’s entry HTML file, so the browser can find the manifest file we just created.
Add the following tag as children of the <head> tag of your /src/app.html. We also link our SVG icon as a favicon and add a <titlte> tag to our <head>.
/src/app.html
<!-- ... -->
<head>
	<!-- ... -->
	<!-- 👇 Add these three lines inside your head tag -->
	<link rel="manifest" href="%sveltekit.assets%/manifest.json" />
	<title>My Offline App!</title>
	<link rel="icon" href="%sveltekit.assets%/icon.svg" />
</head>
<!-- ... -->
We can open the “Manifest” section of the “Application” tab inside dev tools to see how the browser interprets the metadata from our linked manifest file:
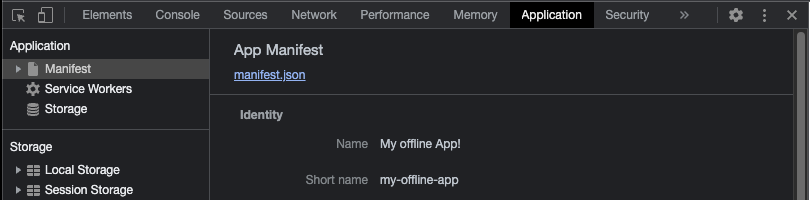
This section will also tell us if we have something missing, like the icons or important metadata.
#Service Worker
Service Workers can be used to progressively enhance web apps. They act as a proxy that sits between the web app and the outside network. This for example allows us to change how network requests are handled.
Learn More
Learn more about Service Workers: developer.mozilla.org - Service Worker API
We will use a Service Worker to enable offline support for our web app by caching all files that are required to load the client frontend that gets served by our SvelteKit app.
Attention
Please note that if your web app requires data from the network at runtime, you will need to explicitly handle it to provide a usable offline experience. In this guide we will only provide the web app itself for offline use. We can use the prerender page option to make pages available offline, but this only works at build time.
#Implement a Service Worker
Create a /src/service-worker.js file that will hold the logic to handle the offline experience. You can also create /src/service-worker.ts, or /src/service-worker/index.js, etc. SvelteKit it will automatically register it in our web app.
When the browser is offline it won’t be able to request the network for the files it needs to start the web app. However, in our Service Worker, we will use workbox-precaching to cache (i.e. save a local copy of) all the files we need to run the app on the first visit. This process is called precaching. When the browser goes offline, we can still serve these cached files, and make our app usable without a network connection.
Install workbox-precaching by running npm install -D workbox-precaching inside the SvelteKit app folder.
SvelteKit provides an easy way to get a list of every client file we need to save locally, thanks to the $service-worker module. It exposes string arrays like build, files and prerendered that contain the names of the files generated by Vite, the files inside the static assets folder (like our images) and every prerendered page and endpoint your SvelteKit app has (if your app has any), respectively. It also exposes a string called version that we will use to track which version of the file we cache, so we serve the correct ones.
Paste the following code to your /src/service-worker.js file.
/src/service-worker.js
import { build, files, prerendered, version } from '$service-worker'
import { cleanupOutdatedCaches, precacheAndRoute } from 'workbox-precaching'

const precache_list = [...build, ...files, ...prerendered].map((s) => ({
	url: s,
	revision: version,
}))

precacheAndRoute(precache_list)
In this code block we first import the necessary information from the SvelteKit $service-worker module and the workbox-precaching helper functions. We then create an array that contains a Workbox PrecacheEntry for every file we need available offline. We also add the '/' entry so the web app loads quickly on revisits and can be quickly opened offline without a network connection. Furthermore, we use the version string from SvelteKit to map a revision to each of our precache entries, so Workbox can keep track of the version of our files. After we got our precache_list, we pass it into the precacheAndRoute helper function from Workbox that will do all the grunt work of caching and serving the files for us.
#Define NODE_ENV
Because workbox-precache uses NODE_ENV to enable debug messages in development mode and Vite (the bundler that powers SvelteKit) doesn’t provide this value in the production build by default, we need to add something to our Vite configuration. We add the define configuration option to our /vite.config.js as follows:
/vite.config.js
const config = {
// ...
// 👇 Add these three lines inside your config object
define: {
'process.env.NODE_ENV': '"production"',
}
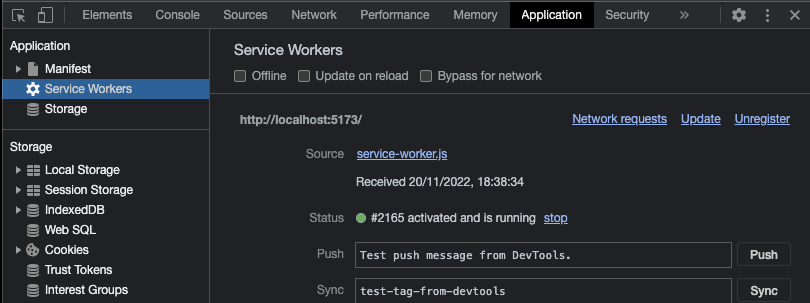
}))We can open the “Service Workers” section of the “Application” tab inside dev tools to see how the browser registered the Service worker:
#Prerender Start URL
Since our start URL is going to be the root page, we will prerender this route. We can prerender this route easily by creating a new file called +page.js in the same directory as our root +page.svelte. Inside the file just set the prerender page option.
/src/routes/+page.js
export const prerender = true#Our final PWA
Attention
You may have to run the production version of the SvelteKit app by running npm run build and then npm run preview inside the terminal.
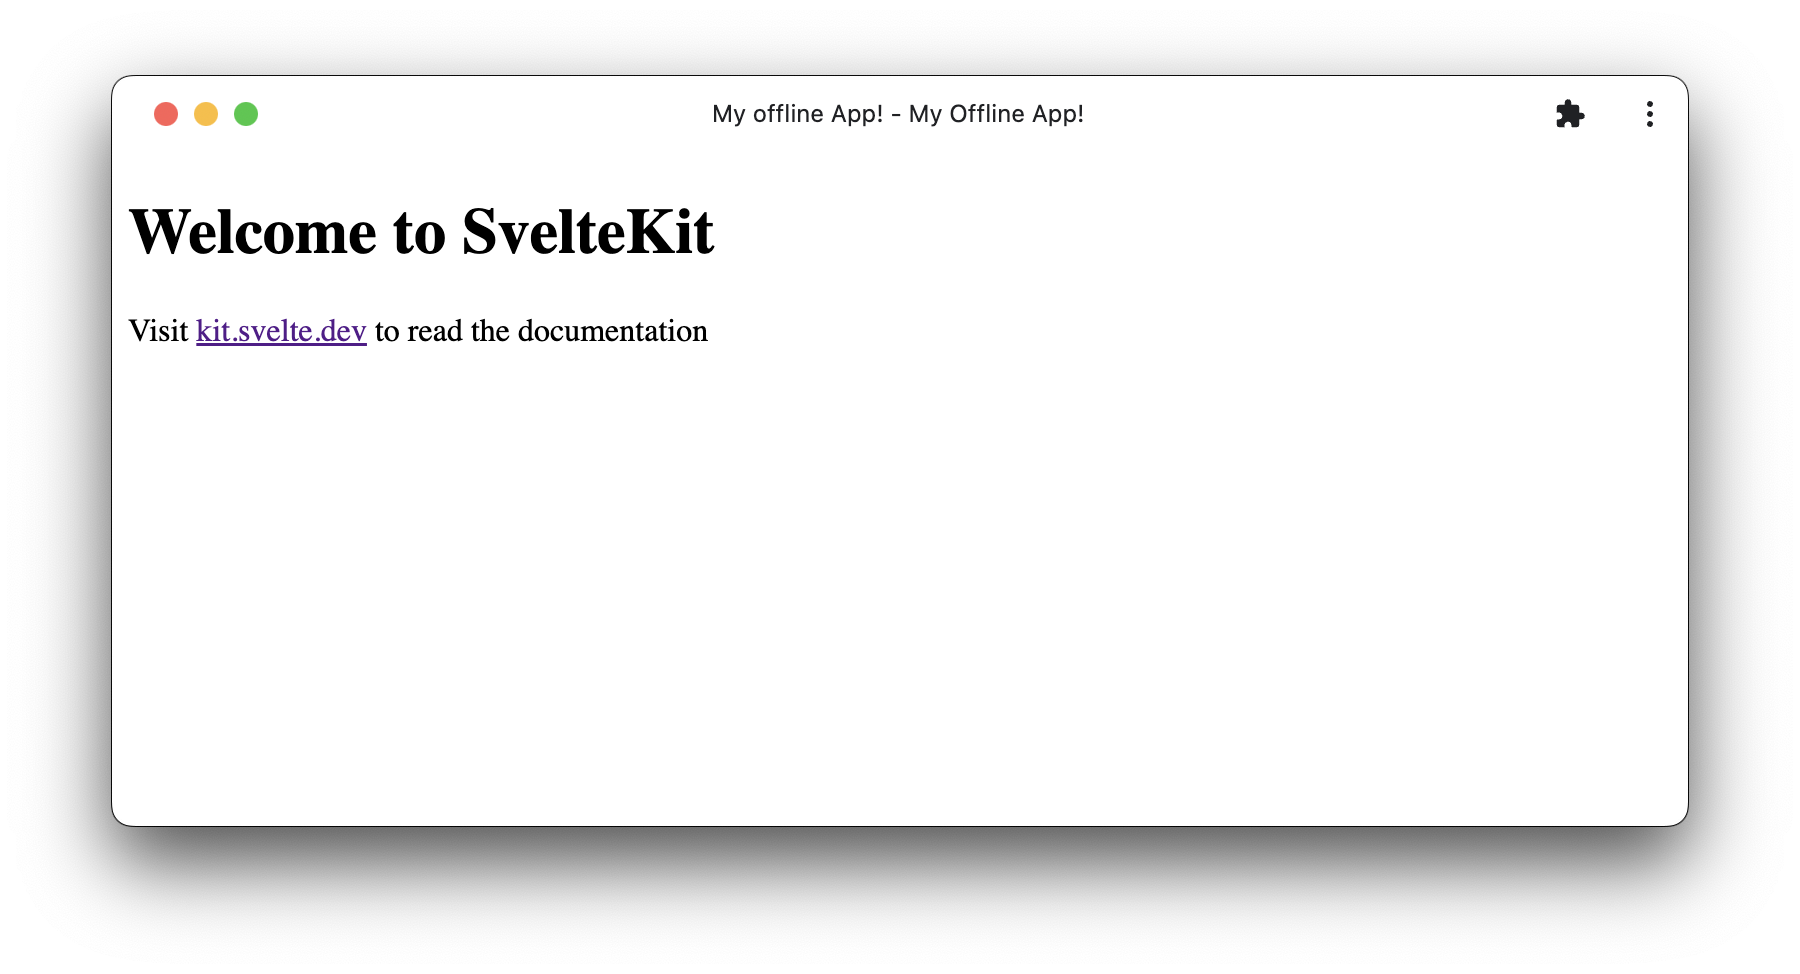
And that’s pretty much it! In Chrome you can install the web app with this button in the URL bar: 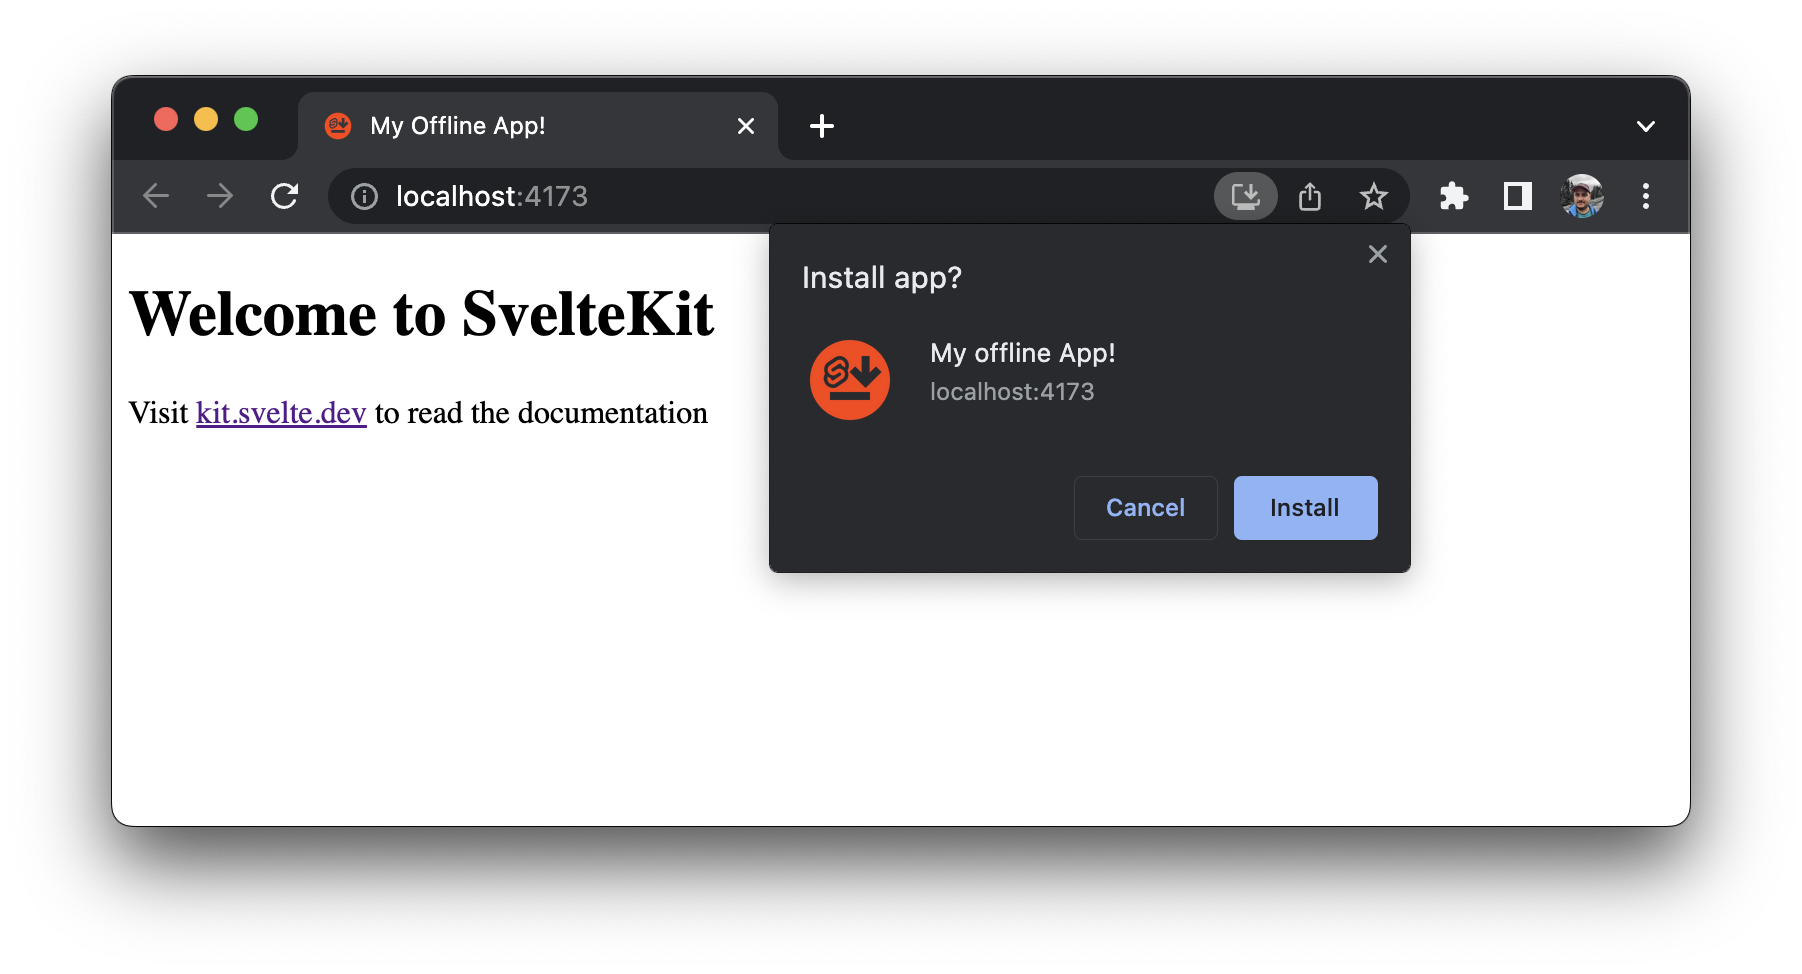 The installed application will appear in a separate window so it can be used outside the browser window:
 To test how the app behaves offline you can switch to “Offline” inside the dropdown at the top of the Network tab. After a reload the app still loads because we can still use our precached files - even without a network connection.
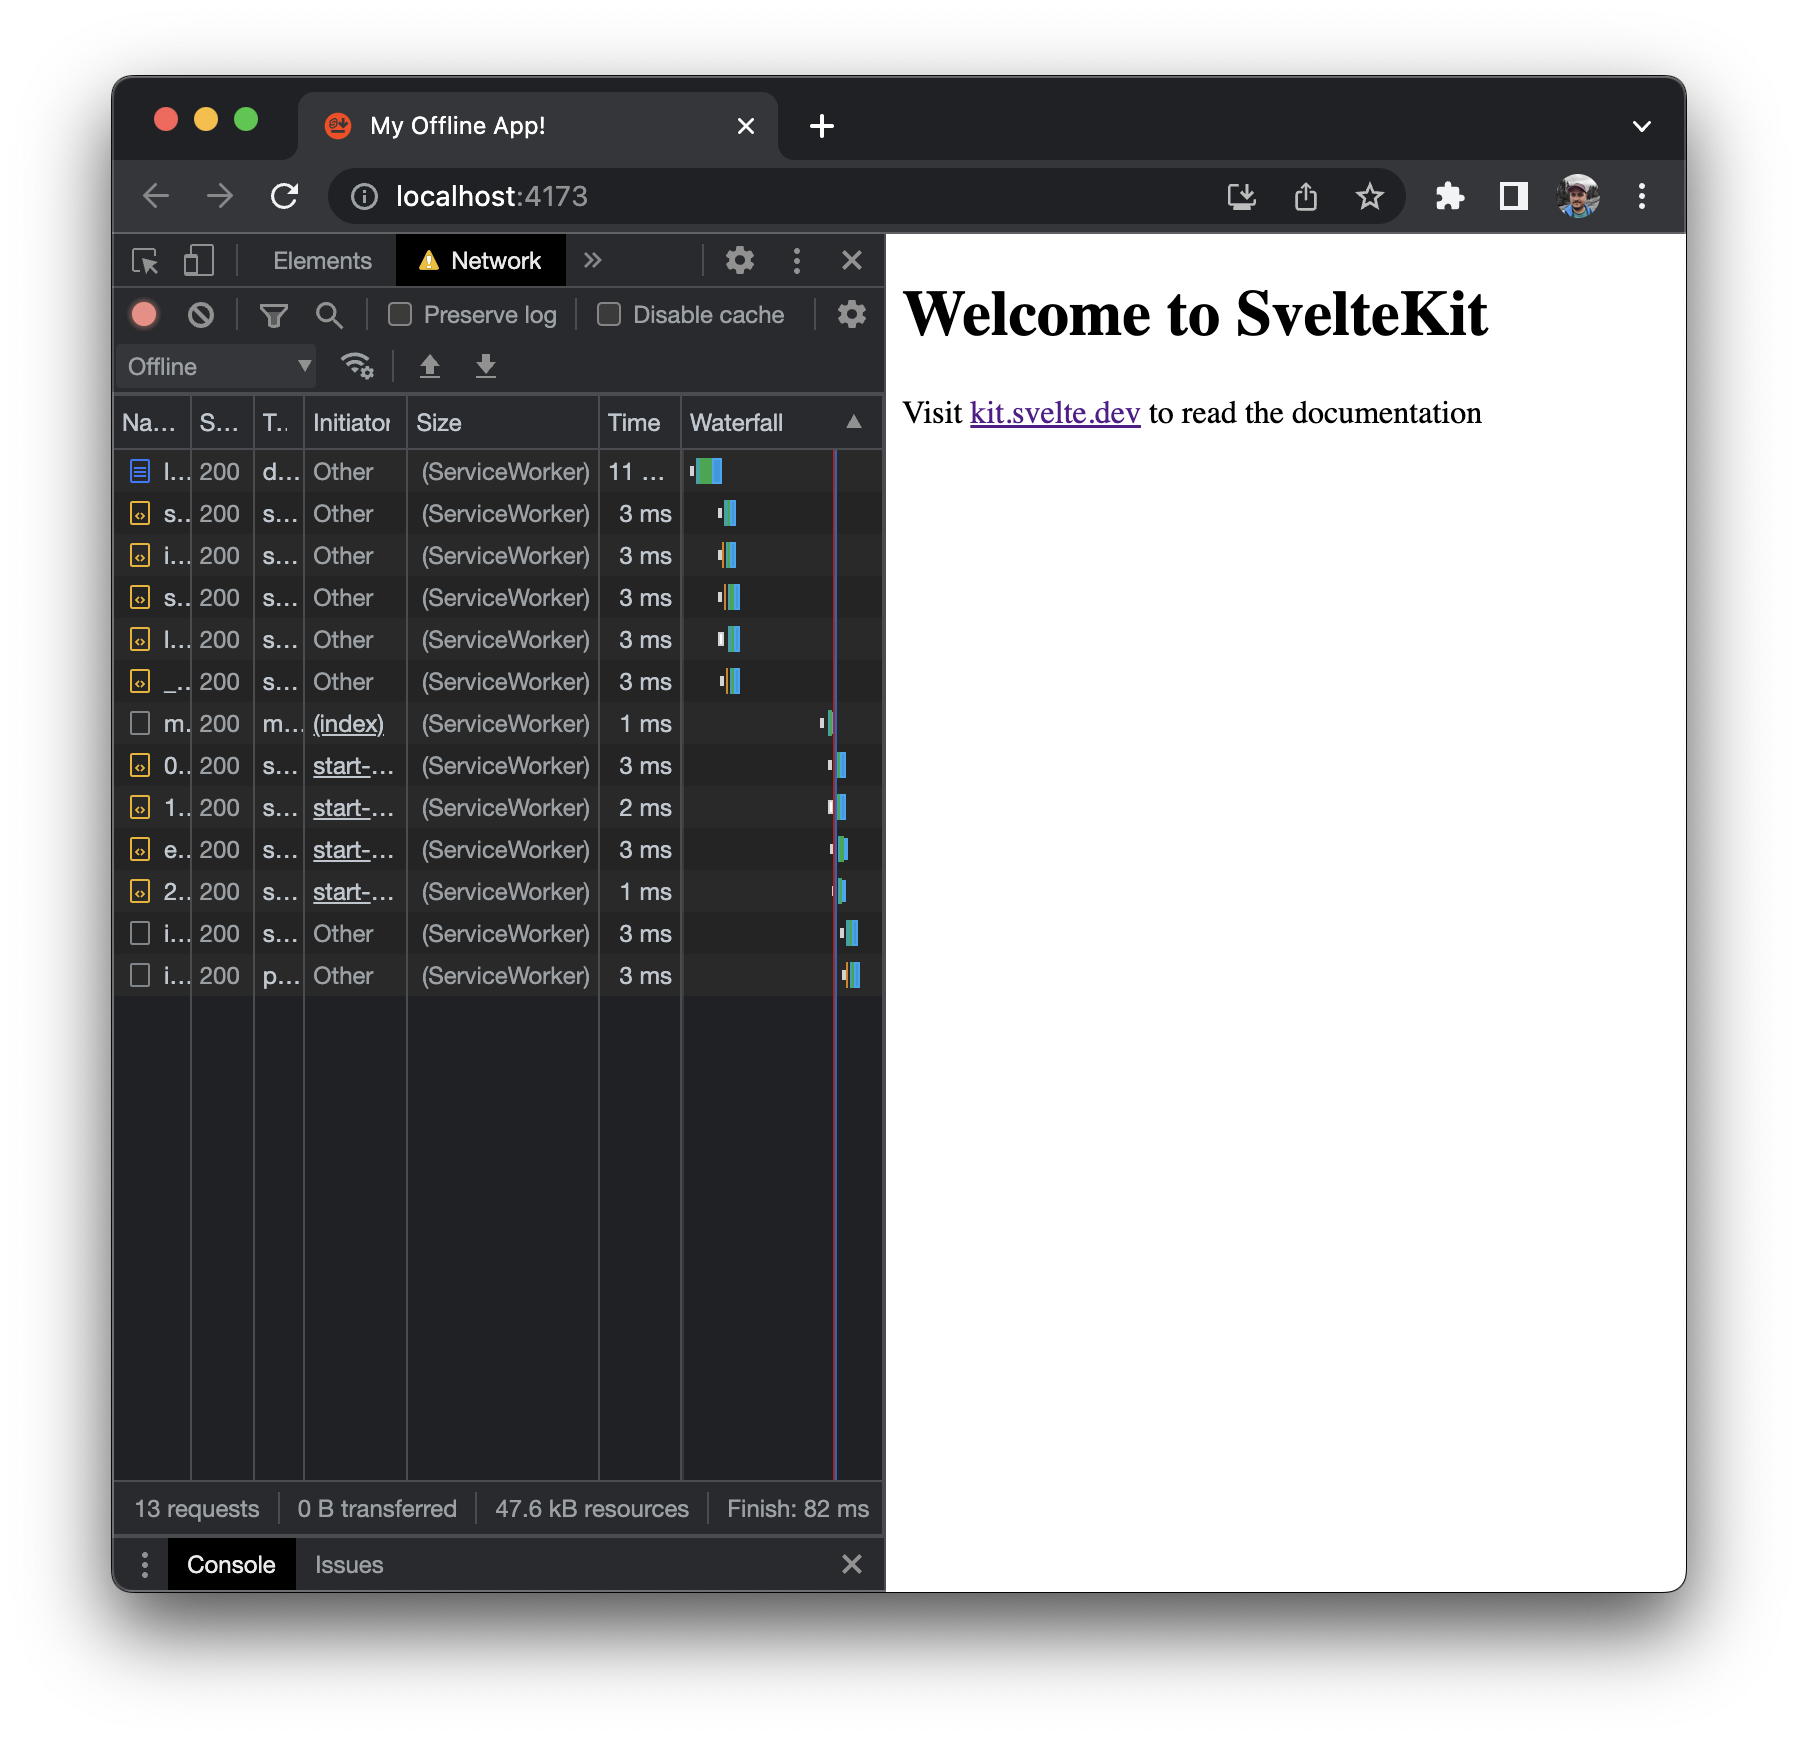 You can see in the Size column of the Network tab that these files are being served by our Service Worker.
#A quick note on waiting Service Workers
When updating your app you will run into situations where you are seeing an old version of the web app, because an old version Service Worker is still controlling the page, and serving the web app using the stale cache (locally saved copy).
The new version of the Service Worker is loaded right away, but it will wait before taking control of the web app until every tab is closed, and the old Service worker can hand the web app over to the new one. You can see it waiting in the “Service Workers” section of the “Applications” tab of the dev tools:
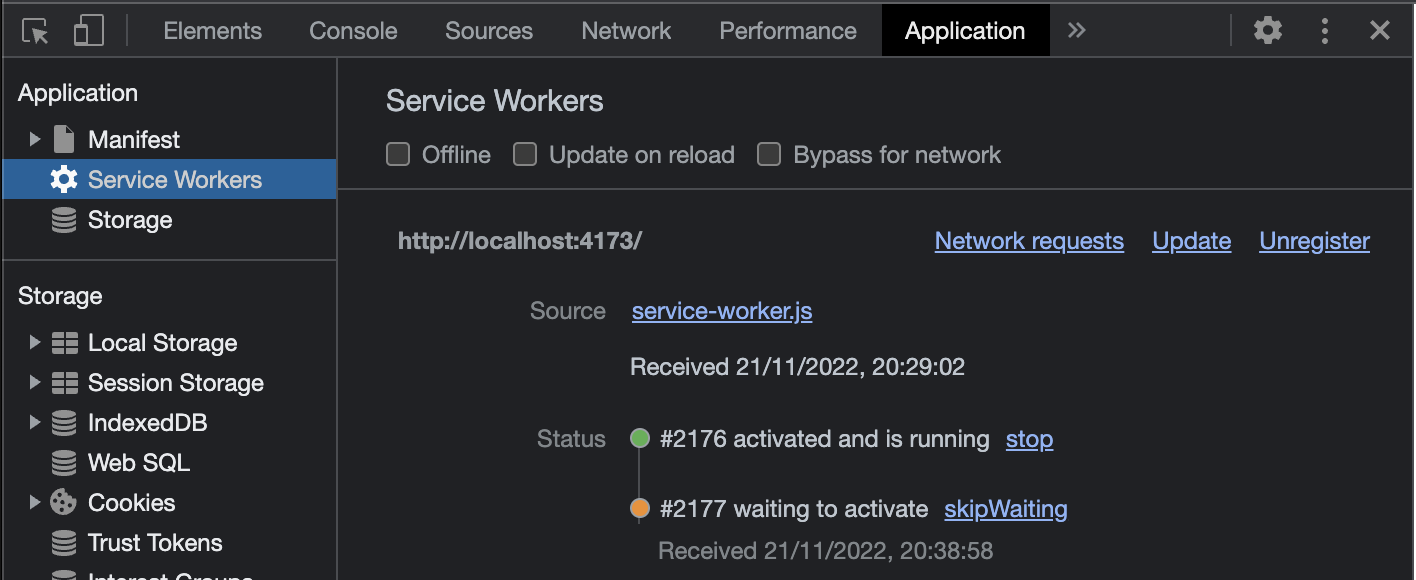
So if you see an old version of the app, close every tab, and reopen it. The new Service worker should take over and serve the new version of the web app. You can also check the “Update on reload” toggle to skip the waiting phase while developing your app.
That was pretty simple, right? Thank so much you for reading and I hope you enjoyed this guide! If you did, or have any questions about it, SvelteKit or PWAs, feel free to hit me up on Mastodon @sarcevic@mastodon.online or Twitter @SarcevicAntonio.